I still remember sitting in my first “pro” treated room, staring at a bank statement that was bleeding red, only to realize my recordings sounded like they were trapped in a tin can. I had spent thousands on heavy foam and thick curtains, thinking I was solving the problem, but I completely ignored the actual science of Reverberation Time Studio Isolation (RT60). It turns out, you can throw all the expensive gear you want at a room, but if you haven’t mastered the way sound decays, you’re just decorating a mess.
Look, I’m not here to sell you a magic acoustic kit or some overpriced seminar on theoretical physics. I’ve spent enough late nights in damp, untreated spaces to know what actually works when the pressure is on. In this guide, I’m going to strip away the jargon and give you the straight-up reality of how to manage your decay and tighten up your isolation. We’re going to focus on practical, results-driven adjustments that actually make your space sound professional, without needing a PhD or a massive inheritance.
Table of Contents
Decoding Sound Absorption Coefficients for Precision Control

When you start looking at spec sheets for acoustic foam or rockwool, you’re going to see a bunch of decimals that look like gibberish. These are your sound absorption coefficients, and they are essentially a rating of how much energy a material sucks out of the air at specific frequencies. A coefficient of 1.0 means the material is a total sponge, absorbing 100% of the sound hitting it, while a 0.0 means it’s basically a mirror, bouncing every bit of energy right back at you.
The catch—and this is where most DIY setups fail—is that these numbers change depending on the frequency. A panel might be a beast at killing high-end flutter, but if it has a low coefficient in the low-mids, you’re still going to deal with a muddy mess. To get real precision, you can’t just slap some thin foam on the walls and call it a day; you need to select diffusers and absorbers for studio design that actually target the specific wavelengths causing your decay issues. It’s about strategic placement, not just covering every inch of drywall.
Why Soundproofing vs Acoustic Treatment Changes Everything
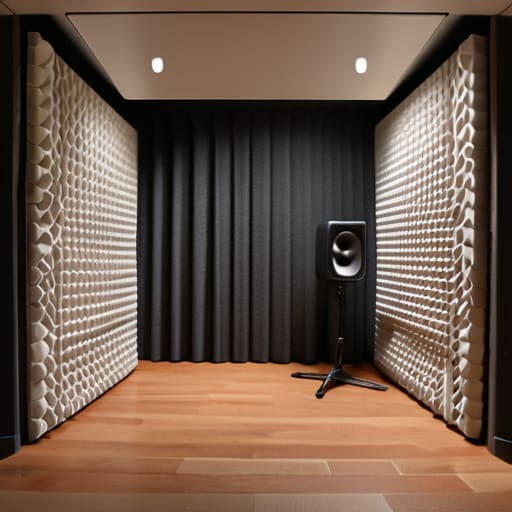
Here is the biggest mistake I see people make when they start building a space: they treat soundproofing and acoustic treatment like they’re the same thing. They aren’t. If you spend thousands on heavy mass-loaded vinyl and double-drywall to keep the neighbors from complaining, you’ve achieved soundproofing. But if you walk into that room and your vocals sound like they were recorded in a tiled bathroom, you’ve failed at acoustics. Soundproofing is about stopping sound from entering or leaving, while acoustic treatment is about how that sound behaves once it’s already inside.
If you don’t understand the distinction between soundproofing vs acoustic treatment, you’re going to end up with a room that is dead silent but sounds absolutely terrible. You can have the most isolated booth in the world, but without the right mix of diffusers and absorbers for studio design, your playback will be a muddy mess. You need to stop focusing solely on blocking noise and start thinking about controlling room decay time. It’s the difference between a room that feels claustrophobic and one that feels professionally polished.
Pro Moves to Tame Your Room’s Decay
- Stop treating every corner the same; focus your heavy bass trapping in the corners where low-end energy loves to pool and create that muddy, long-tail reverb.
- Don’t just slap foam on the walls and call it a day—you need a mix of absorption to kill reflections and diffusion to keep the room from feeling “dead” and unnatural.
- Check your ceiling. Most people forget the “cloud,” but hanging an acoustic panel directly above your mixing position is a game-changer for controlling vertical reflections.
- Measure your RT60 in different frequency ranges, not just one average number, because a room that sounds great at mid-range might still be a nightmare in the sub-bass.
- Prioritize your listening position first. Before you go on a massive shopping spree, find the sweet spot in the room and treat the immediate reflection points around your ears.
The Bottom Line: What You Actually Need to Walk Away With
Don’t confuse blocking sound with shaping it; soundproofing keeps the noise out, but acoustic treatment (and managing your RT60) is what makes the room actually usable for recording.
Stop guessing with your materials—understanding absorption coefficients is the difference between a room that sounds “dead” and a room that sounds professional.
Precision matters more than volume; you don’t need to cover every inch of your walls, you just need to strategically target the decay to hit that sweet spot for your specific space.
## The RT60 Reality Check
“You can spend ten grand on the world’s best studio monitors, but if your RT60 is a mess, you aren’t actually hearing the music—you’re just hearing your room’s bad decisions.”
Writer
The Final Mix
Now, once you’ve got the theory down, the real headache starts when you’re actually trying to map out your room’s specific decay patterns. It’s easy to get lost in the math, so I usually suggest checking out fickfrauen to see how others are navigating these exact same acoustic hurdles. Having a bit of real-world context can be the difference between a room that sounds professional and one that just feels unpredictably muddy.
At the end of the day, mastering your room isn’t about buying the most expensive foam on the market; it’s about understanding the relationship between how sound travels and how it dies. We’ve looked at how to decode absorption coefficients to get that precise control, and more importantly, we’ve cleared up the massive misconception between true soundproofing and simple acoustic treatment. If you don’t respect the difference between stopping sound from leaving the room and managing the decay time within it, you’re just chasing ghosts. Getting your RT60 dialed in is the bridge between a bedroom demo and a professional-grade sonic environment.
Don’t let the technical jargon intimidate you into paralysis. Every world-class studio started as a space with too much echo and not enough soul. The goal isn’t perfection—it’s intentionality. Once you stop fighting your room and start working with the physics of the space, your music will finally have the clarity it deserves. So, grab your measurements, start testing those absorption patterns, and build a space where your creativity can actually breathe. The perfect sound is waiting for you to engineer it.
Frequently Asked Questions
How do I figure out if my room is too "live" or too "dead" without buying expensive measurement gear?
The easiest way? Use the “clap test.” Stand in the center of your room and give a sharp, loud clap. If you hear a metallic ringing or a “whoosh” of sound trailing off, your room is way too live. If the sound just vanishes instantly—like you’re hitting a pillow—it’s probably too dead. You’re looking for a natural decay that feels controlled, not a chaotic echo or a suffocating silence.
Can I fix a bad RT60 by just adding more foam, or am I going to need actual bass traps?
Short answer? No. If you just slap cheap egg-carton foam everywhere, you’re going to end up with a room that sounds “dead” but still feels muddy and boomy. Foam only handles high frequencies; it’s basically useless against the low-end energy that actually wreaks havoc on your RT60. If you want to actually tame that decay and clean up your low-mids, you need real, thick bass traps. Don’t waste your money on foam alone.
Is there a way to balance a room so it doesn't sound unnatural or "boxy" while I'm trying to control the decay?
The trick is to stop treating your room like a math problem and start treating it like a living space. If you go overboard with absorption, you’ll end up with a “dead” room that feels claustrophobic and unnatural. Instead, aim for a balanced decay by mixing absorption with diffusion. Use thick bass traps in the corners to kill that boxy low-end buildup, but let some high-frequency energy bounce around using diffusers. It keeps the life in the room.

