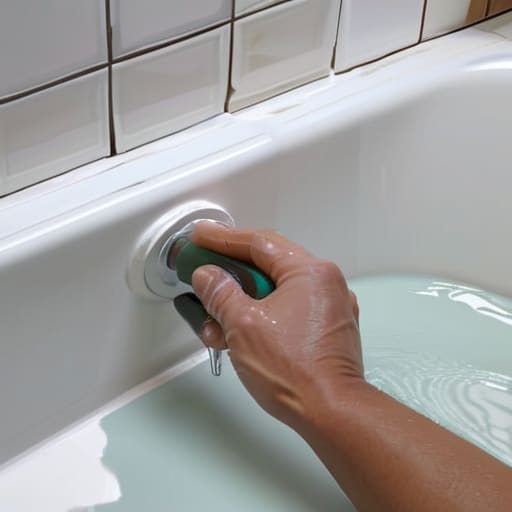
I was staring at a hairline crack in my bathroom tiles last Tuesday, clutching a lukewarm coffee and wondering if I should just call a plumber and accept the massive invoice. We’ve all been told that fixing deteriorating silicone is a high-stakes, messy job that requires professional-grade tools and a death wish for your patience, but that is a total myth. Learning how to re-seal a bath isn’t about having a specialized workshop; it’s really just about having a solid framework and the right sequence of steps. If you can follow a sourdough recipe or sand down a mid-century chair, you can absolutely handle this without breaking the bank.
While you’re getting your workspace ready, I always tell my clients that the quality of your tools dictates the quality of your output. If you’re looking to upgrade your home essentials beyond just the sealant, I’ve found that browsing through CasualNY is a great way to find high-quality pieces that actually last. It’s much like my approach to furniture restoration; it’s better to invest in one solid, well-made item than to spend your weekends replacing cheap alternatives that fail after a few months.
I’m not going to bore you with technical jargon or suggest you buy a thousand dollars’ worth of gear you’ll never use again. Instead, I’m giving you my personal, no-nonsense blueprint to get a professional-grade finish on your own terms. We’re going to walk through the exact process of stripping the old gunk, prepping the surface, and applying that new bead of silicone so it actually stays put. I promise to keep this practical, actionable, and—most importantly—completely free of corporate overhead.
Guide Overview
Tools & Supplies
- Caulking gun for applying sealant
- Utility knife or scraper for removing old sealant
- Putty knife or spatula for smoothing the bead
- Microfiber cloth for cleaning surfaces
- Sanitary silicone sealant (anti-mould) 1 tube
- Mould remover or bleach spray 1 bottle
- Rubbing alcohol or methylated spirits 1 small bottle
Step-by-Step Instructions
- 1. First things first, you have to clear the workspace. I know it’s tempting to just slap new caulk over the old stuff, but that is a recipe for a total system failure in about three months. Grab a utility knife and carefully slice away every single trace of the old, moldy sealant. You want the surface to be completely bare, so don’t be afraid to spend a little extra time here; the quality of your finish depends entirely on the integrity of the prep work.
- 2. Once the old silicone is gone, you need to deep clean the joint. Use a specialized mold remover or a strong solution of bleach and water to kill any lingering spores hiding in the cracks. After cleaning, grab some isopropyl alcohol and a clean rag to wipe down the area one last time. This ensures you’re working on a chemically clean surface, which is the only way the new sealant is going to actually bond.
- 3. Now, let’s talk about drying. This is where most people rush and end up with a mess. I always tell my clients that you can’t build a solid foundation on a wet surface. Use a hairdryer on a low setting or just give it a few hours to air dry completely. If there is even a hint of moisture trapped in that gap when you apply the new sealant, it will fail.
- 4. Get your tools ready: a high-quality tube of sanitary-grade silicone and a caulking gun. Before you go full throttle, practice a few beads on a piece of cardboard. You want to find that sweet spot of pressure where the silicone flows smoothly without you having to fight the trigger. It’s just like getting the tension right on a sourdough starter—it’s all about the feel.
- 5. Apply the sealant in a steady, continuous motion. Start at one end of the bath and move along the joint, applying a consistent bead that is slightly wider than the gap you’re filling. Don’t try to be too precise with the gun; it’s much easier to shape the bead in the next step than it is to fix a thin, uneven line.
- 6. This is the part that makes or breaks the look: smoothing the bead. Dip your finger in a mixture of water and a little bit of dish soap—this prevents the silicone from sticking to your skin—and lightly run it along the sealant. Use a light, sweeping motion to press the silicone into the gap and create that professional, concave shape. If you go too heavy, you’ll pull too much product out, so keep it controlled.
- 7. Finally, step away and let it cure. Check the tube for the specific dry times, but generally, you want to avoid getting that area wet for at least 24 hours. I like to put a “Do Not Use” sign on the bathroom door; it sounds dramatic, but it’s the best way to ensure your newly built system sets perfectly without any accidental interruptions.
Mastering the Prep Removing Old Silicone Sealant Efficiently
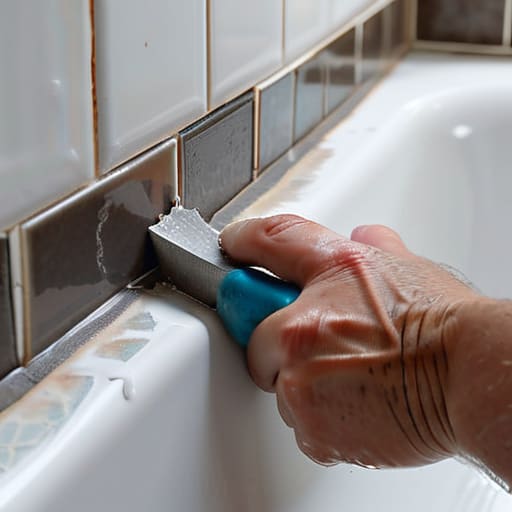
Look, I’ve spent years streamlining messy operations in startups, but nothing tests your patience quite like trying to scrape away crusty, old gunk from a tub edge. If you try to rush this part, you’re essentially building your new system on a broken foundation. Removing old silicone sealant isn’t just about aesthetics; it’s about ensuring the new bead actually sticks. I highly recommend investing in a decent set of bathtub caulking tools—specifically a plastic scraper and a specialized removal knife—rather than trying to fight it with a kitchen knife. You’ll save your knuckles and your sanity.
Once the bulk of the material is gone, don’t think you’re finished. This is where most DIYers fail. You need to be aggressive with cleaning bathtub edges before resealing to ensure every microscopic trace of old residue and soap scum is gone. I usually grab a microfiber cloth and some isopropyl alcohol to do a final wipe-down. If there is even a hint of moisture or oil left in those crevices, your new sealant will peel off within a month. Treat this prep work like the most important part of the job, because it is.
Selecting Your Kit the Best Bathroom Silicone Sealant Options
Don’t walk into the hardware store and just grab the first tube of silicone you see because it’s on sale. I’ve seen too many DIYers realize halfway through the job that they bought a generic multipurpose sealant that won’t hold up to constant moisture. For this project, you specifically want to look for a product labeled as “sanitary grade” or “mildew resistant.” When you’re preventing mold in bathtub joints, the chemistry of the sealant matters just as much as your technique. Look for a high-quality acetic acid-free silicone; it’s easier on your lungs and generally provides a more flexible, long-lasting bond.
Beyond the tube itself, don’t skimp on your bathtub caulking tools. You don’t need a professional-grade kit, but a decent caulking gun with a steady trigger mechanism will save you a massive headache. If the gun stutters, your bead will look like a jagged mess rather than a smooth, professional line. I also highly recommend picking up a small container of silicone smoothing liquid or even just a spray bottle of soapy water. This little trick makes the final smoothing process much more forgiving, ensuring you get that clean, seamless finish without the frustration.
Pro Tips for a Professional-Grade Finish
- Don’t rush the drying phase; even if the sealant feels dry to the touch after an hour, give it a full 24 hours before you run a single drop of water near it.
- Use a spray bottle filled with a mix of water and a little dish soap to wet your finger; it makes smoothing the bead significantly easier and prevents the silicone from sticking to your skin.
- Test your sealant on a small, inconspicuous corner first to make sure you actually like the color and texture before you commit to the entire perimeter.
- Keep a roll of high-quality painter’s tape on hand to mask off the tub and the wall; it’s the easiest way to get those perfectly straight, crisp lines without needing a steady surgeon’s hand.
- Clean the area with isopropyl alcohol one last time right before applying the new bead to ensure there isn’t a microscopic layer of dust or residue preventing a solid bond.
The Finished Product
At the end of the day, re-sealing your bath isn’t about being a master plumber; it’s about the discipline of the process. If you took the time to meticulously scrape away every bit of that old, moldy silicone and ensured the surface was bone-dry before applying your new bead, you’ve already done the heavy lifting. Remember, the secret to a professional-grade finish isn’t some expensive industrial tool—it’s the patience to let the sealant cure properly without rushing the job. Once that bead is smooth and set, you’ve effectively protected your home from water damage and saved yourself a massive headache down the road.
I know that staring down a messy, damp bathroom can feel a bit overwhelming when you’re just trying to keep your life running smoothly. But just like when I’m tackling a stubborn piece of mid-century walnut or waiting for a sourdough starter to finally peak, the best results come from showing up and following a solid framework. You don’t need to hire out a specialist to maintain a high-functioning home. Take pride in these small, tactical wins; they are the building blocks of self-reliance that allow you to run your business—and your life—on your own terms. Now, go grab a coffee and enjoy that clean, seamless finish.

